7 Steps 20 min
Step 1: Upload your new Blogger Template
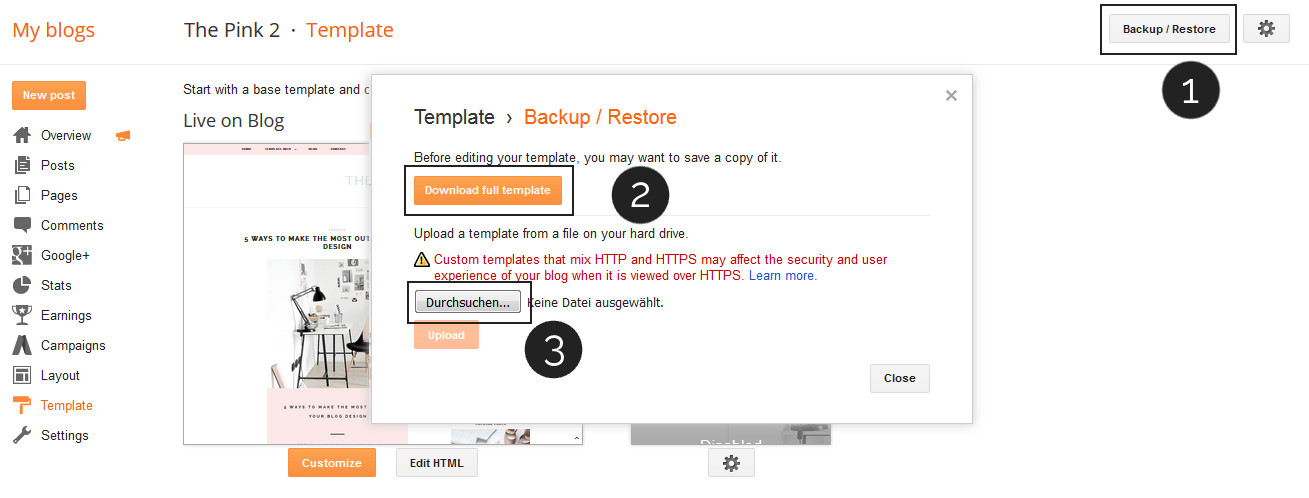
- In your Blogger dashboard go to 'Template'. Click on 'Backup/Restore' in the right corner of the site.
- We recommend to always save your current template if something goes wrong. (Click on the 'Download full template' button to save your template.)
- Now you can go ahead and upload your new template! Upload the '.xml' file that comes in the zip folder you received from us and then simply hit the 'Upload' button.
Step 2: Set up the drop down menu

-
In your Blogger dashboard go to 'Layout'. You will see a LinkList gadget - click edit and follow these steps to set up the menu:
- First-level menu item: The menu item names goes into 'New Site Name' and the URL into 'New Site URL'. Here you can read how to link to label pages.
- Second-level menu item: Works just the same as a first level item, but you have to put an underscore ( _ ) before the item name.
- Please be sure to put all second level items right below the first level item where they should appear. It should look like in the picture above.
Add social media icons
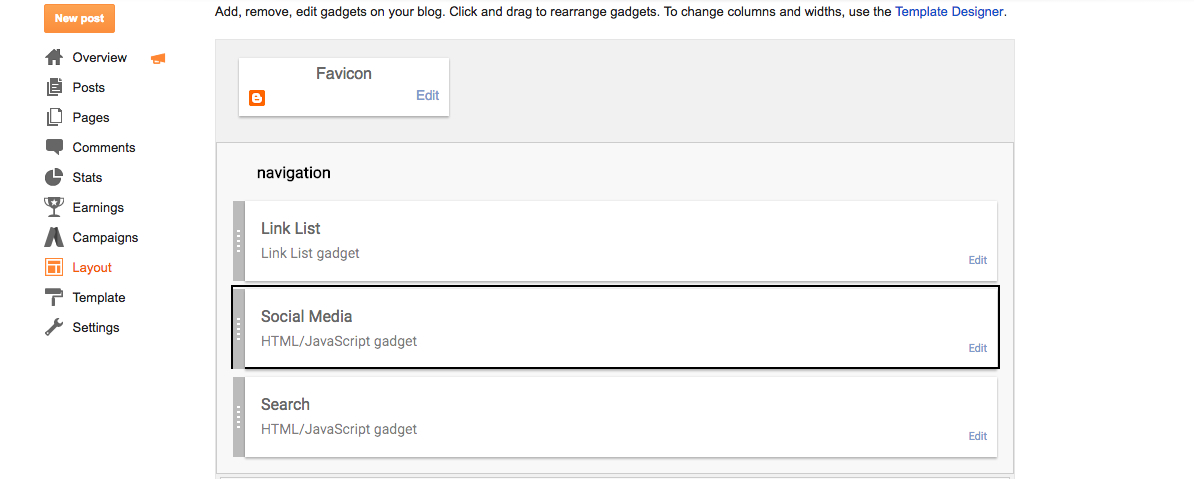
First of all, you need to add the code from socialmedia.txt (it's in the template zip folder you received from us) into a HTML/JavaScript gadget in the Layout section. You need add it to the sidebar of the template. This template comes with 7 different social media icons, if you want to add more, you can search them at FontAwesome.
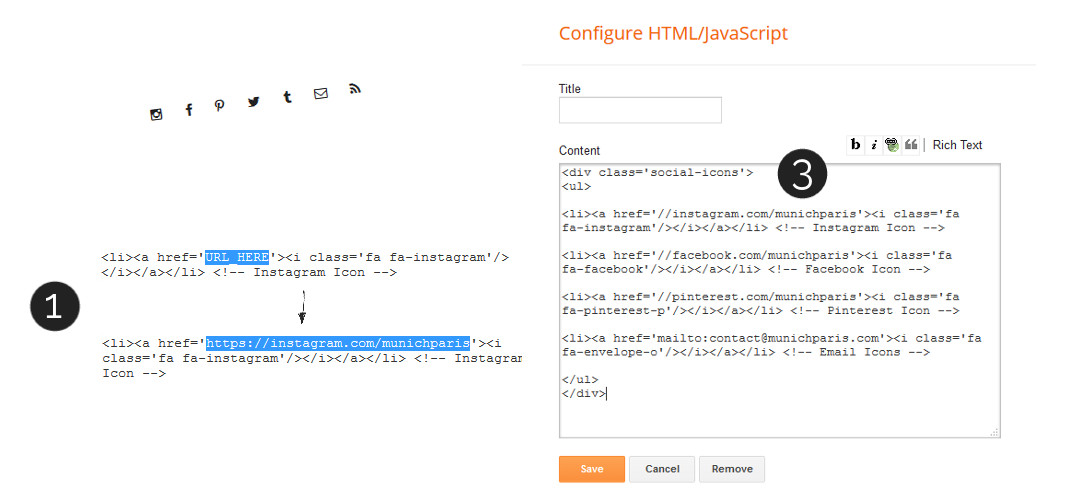
To link the icons to your social media channels follow these steps:
- Insert the adress to your social media profile where it says 'URL_HERE'.
- Now delete all the lines with icons you don't need.
- Example: You want to include Instagram, Pinterest, Facebook and additional a little envelope for your contact details. Your code would look like in the picture above.
Add custom widgets (About, Search Widget)
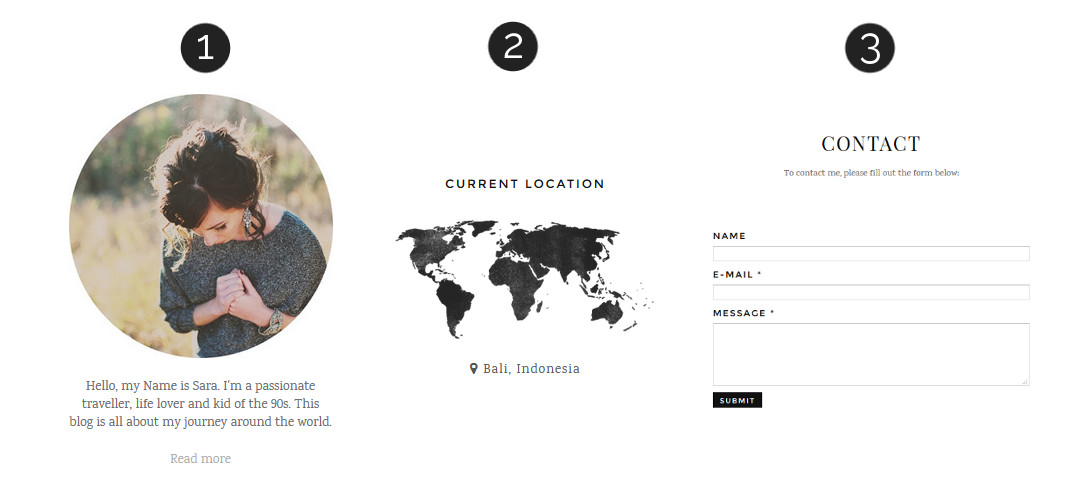
If you opted for The White with sidebar, your template comes with different custom widgets - some of them will appear automatically, some have to be added and customized manually.
- About widget: Paste the code from about.txt into a HTML/JavaScript widget in the sidebar. All instructions on how to add your own profile photo and text come within the text file.
- Search widget: Again, paste the code from search.txt into a HTML/JavaScript widget in the sidebar.
Display your Instagram feed in the footer

-
Generate your Instagram Access Token and copy it.
- In your Blogger dashboard, go to 'Template', click 'Edit HTML' and search for 'instafeed' until you find the piece of code in the picture above. (You can search the Blogger Code Editor with Ctrl+F or Cmd+F)
- Paste your Access Token after it reads "AccessToken".
- Your User ID is the first part of your Access Token until the dot. Paste it where it reads "UserID".
Make your template mobile responsive

Last step! Finally you have to ensure that on smartphones and tablets the mobile responsive version of the template shows and not the ugly Blogger mobile view. To do this, follow these steps:
- In your Blogger dashboard, go to 'Template'. There's a mobile demo view, right below click the settings button.
- In the settings window you have to tick 'No. Show desktop template on mobile devices.'
Important notes to use this template:
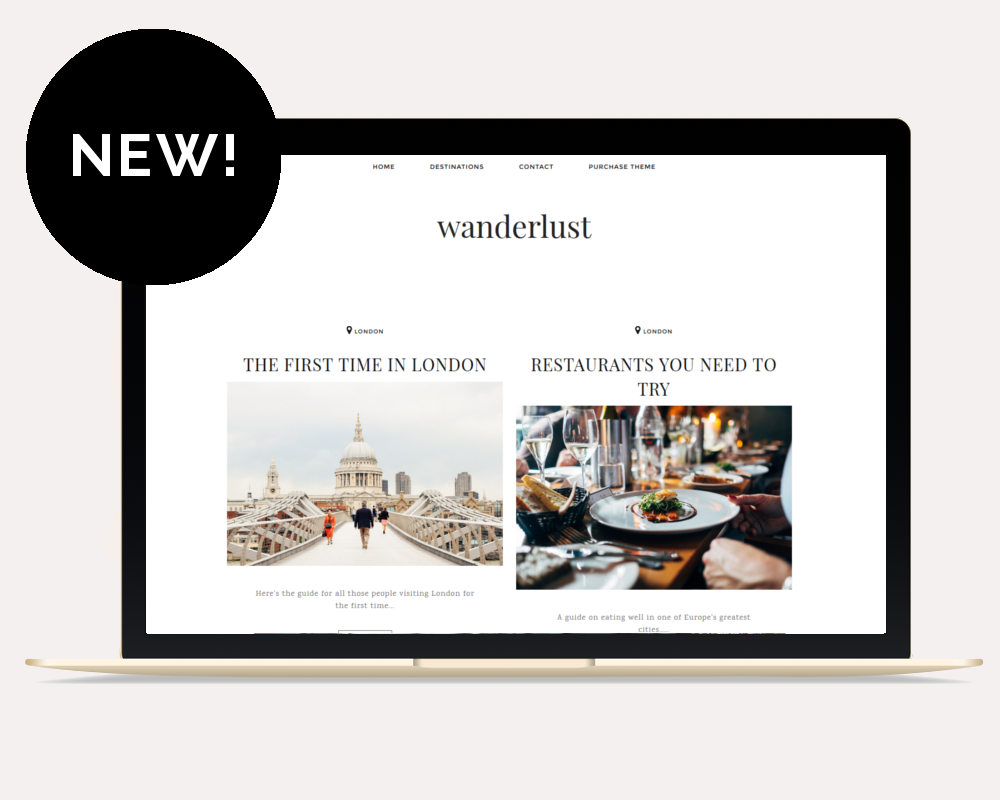
- If you want to upload your own header image, you have to select 'Instead of Title and Description'.
- The first picture of every post needs to be uploaded via Blogger to generate the thumbnail image for the homepage and the slideshow.
- You can easily change the colors and fonts of the template in the Blogger Template Designer.
- To make the slider show up, please note that you need to have at least 5 posts on your blog. Each post needs one label (or more). Also, your blog has to be public.